Monday, February 28, 2011

Project: Evolving Drawings

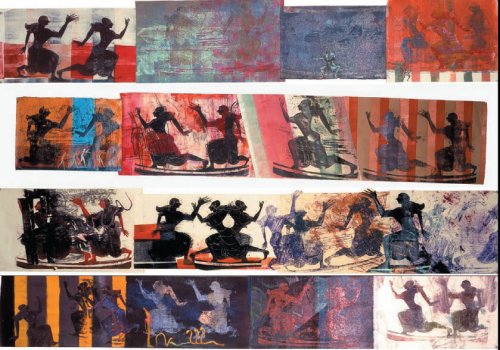
The idea of this project is to take a drawing through a process of photocopies and reworking, creating a collection of drawings showing a progression of evolution from the first drawing into something completely different.

1. On an 8.5 x 11" paper, draw an object in any media you'd like.

2. Take this drawing and photocopy it.

3. Take this photocopy and draw on top of it. You can use white-out, paint, collage, charcoal, ink, whatever.

4. Take this drawing and photocopy it. There are also features such as contrast and zoom on the copymachine to utilize.

5. Repeat this process until you have 10 drawings that are part photocopied, part drawing.

Throughout this process- begin thinking about the idea of time and transformation in the drawings that you are making. There will be a literal sense of this happening through the process, with evidence of the last drawing in the latest one- but also maybe the images you select to draw reflect this process. Is there a story, will there be a flipbook/animated quality to your series? Or, maybe you will you just begin the process and let the imagery come to you as you work?

I don't have any student examples, but take a look at Jenna Weiss's show at Grizzly Grizzly from a few months ago. She used this same process to create a series of abstract mixed media works.

*Note: For our class, you should start with a representational drawing, and mainly keep it representational as this is an observational drawing course. However, abstract elements and compositional strategies can be added, and your objects/figures that you draw can become abstracted through the process.


http://theartblog.org/blog/wp-content/uploaded/Jennaweissandxeroxes.jpg

After you have completed 10 drawings, take your favorite and blow it up to 22 x 30" or bigger (it will be more fun to work even larger). You can do this using the oversized black and white printer at Kinkos or Staples. Take this larger copy and rework that as well.

Artists to check out, from Andrea's visit- Shahzia Sikhander


http://www.pbs.org/art21/artists/sikander/

Artists to check out, from Andrea's visit- Paula Wilson


http://www.bellwethergallery.com/artistsindex_01.cfm?fid=440&gal=1

Artists to check out, from Andrea's visit- Nancy Spero


http://www.pbs.org/art21/artists/spero/

Monday, February 14, 2011

Project 4- Assembling Meaning- Collage (Part 2)

This project builds off of the last collage. We will use 30 x 40" paper for this drawing. If you can't find paper already that large, then take two 22 x 30" sheets and connect them at the edges (don't overlap them). If there is a deckled edge, just use a ruler and blade to cut it straight, butt up the two edges and tape on the back.

Once you've prepared your paper- use a pencil or vine charcoal to draw in shapes from your collage. Carefully observe the images, scale them up to the larger paper and do a contour drawing of important elements from your collage image. Here's an example:


The end result could look like figurative silhouettes or be just abstract shapes, but please observe and draw these shapes proportionately and descriptively.

From here, it's up to you to interpret the original collage into a new image. You can collage and draw within these shapes. Play with flat vs 3 dimensional forms. Use line drawing as well as value. Try textures, patterns, and colors.

Bring this outline drawing, along with drawing materials and scrap papers to the next class for in-class studio work. We will also be creating collage materials through rubbings, monoprinting, and marbling to use in this project.